How to Photograph Clothes for Online Sales (Even Without Expensive Gear!)
Want your clothes to sell faster online? Here’s the secret: it’s not just about the clothes — it’s about how they LOOK in your product photos. In a digital-first world, your photo is your storefront. Whether you’re selling on Amazon, eBay, Etsy, or your own store, this guide will show you how to take professional-looking clothing photos on a budget.
Why Clothing Photography Matters
A photo makes the first impression. If your product looks wrinkled, dark, or poorly styled — you lose trust instantly. Great photos:
- Increase click-through rate (CTR)
- Boost conversions and reduce returns
- Build brand trust and authority
Shoppers can’t touch or feel your product. So your image needs to do the talking.
According to eCommerce studies, product photos influence up to 93% of buying decisions. That’s why knowing how to photograph clothes the right way is essential if you want to stay competitive.
Choose Your Photography Style: Mannequin, Model, or Flat Lay
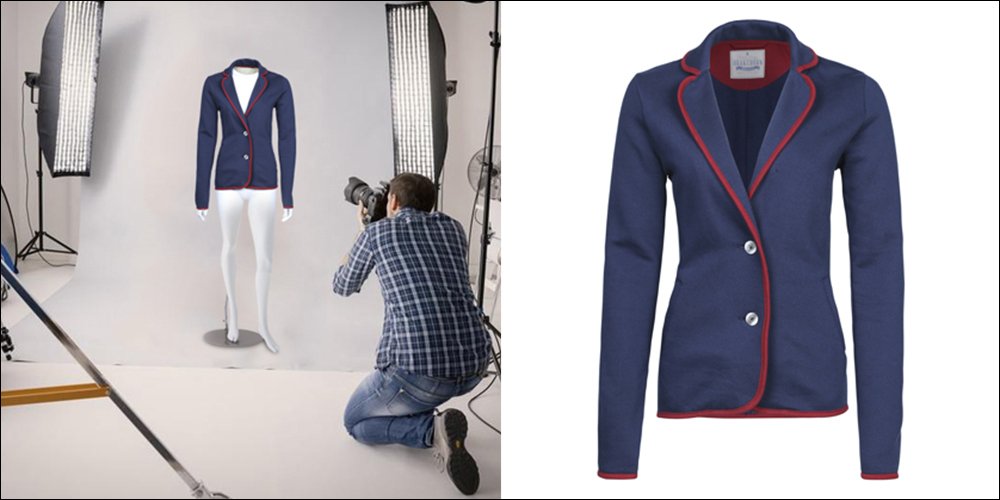
Option 1: Ghost Mannequin (Most Popular)
- Looks professional
- Shows shape, fit, and contour
- More budget-friendly than models
Option 2: Model Photography
- Adds emotion, context & lifestyle value
- Ideal for high-fashion or boutique stores
- Works great for social media & ads

Option 3: Flat Lay Photography
- Best for small items: T-shirts, baby clothes, socks
- Simple and beginner-friendly
- Requires minimal equipment

Tip: Flat lay is perfect for solo sellers or influencers. As you grow, mannequins and models elevate your brand presentation.
Prepare Your Clothes Like a Pro
Before the photoshoot:
- Iron or steam everything to remove wrinkles
- Remove any dust, tags, stickers, or price labels
- Use a lint roller to eliminate loose fibers or pet hair
- Pin, tape, or stuff the fabric to create volume and structure
A wrinkled or messy product kills your credibility. Clean, styled garments invite the click.
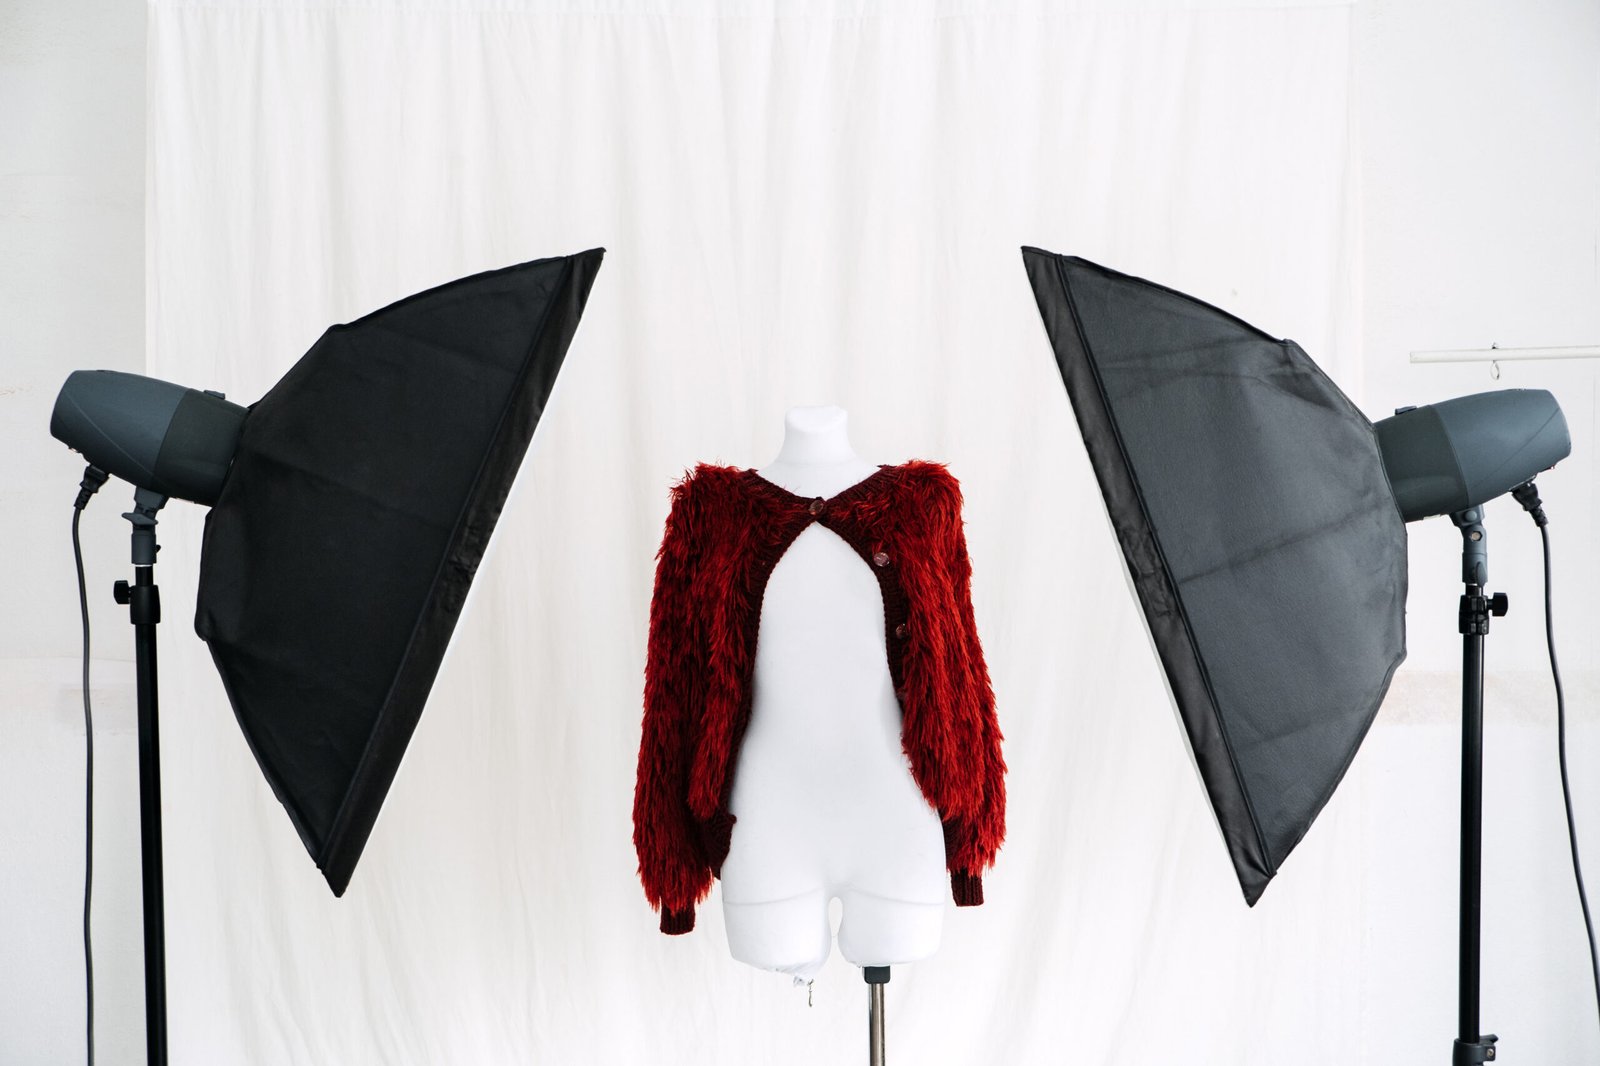
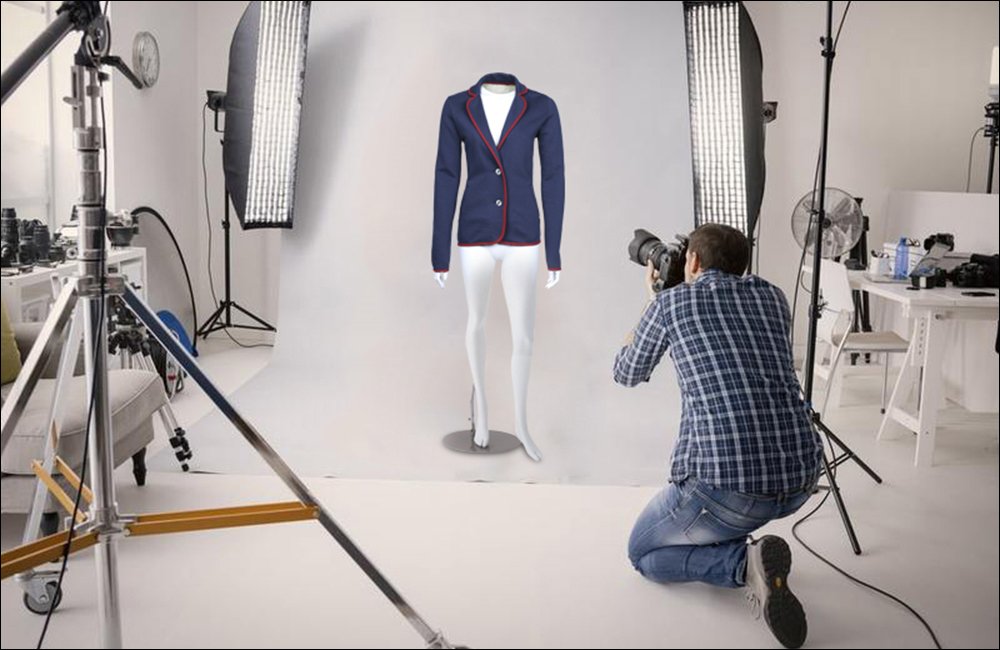
Build a DIY Studio on a Budget
You don’t need a full studio to get studio-quality results. Here’s what you need:
- Backdrop: A white wall, curtain, or large paper roll
- Lighting: Softbox lights, ring light, or natural light near a window
- Tripod: Even a basic phone tripod ensures steady shots
- Surface/Table: For flat lays, use a clean, flat table or board
Pro Tip: Use household items like white foam boards to bounce light and eliminate shadows.

Lighting & Background Hacks
Lighting Tips:
- Use soft, diffused light – harsh light creates ugly shadows
- Place your lights at 45-degree angles on both sides of the product
- Avoid mixing light sources (e.g., don’t mix sunlight with warm bulbs)
Background Tips:
- Stick to plain white or neutral grey
- Avoid patterns or textured walls that distract the eye
- Use backdrops that match your brand style
Clean, bright images perform best on Amazon, Shopify, and eBay.
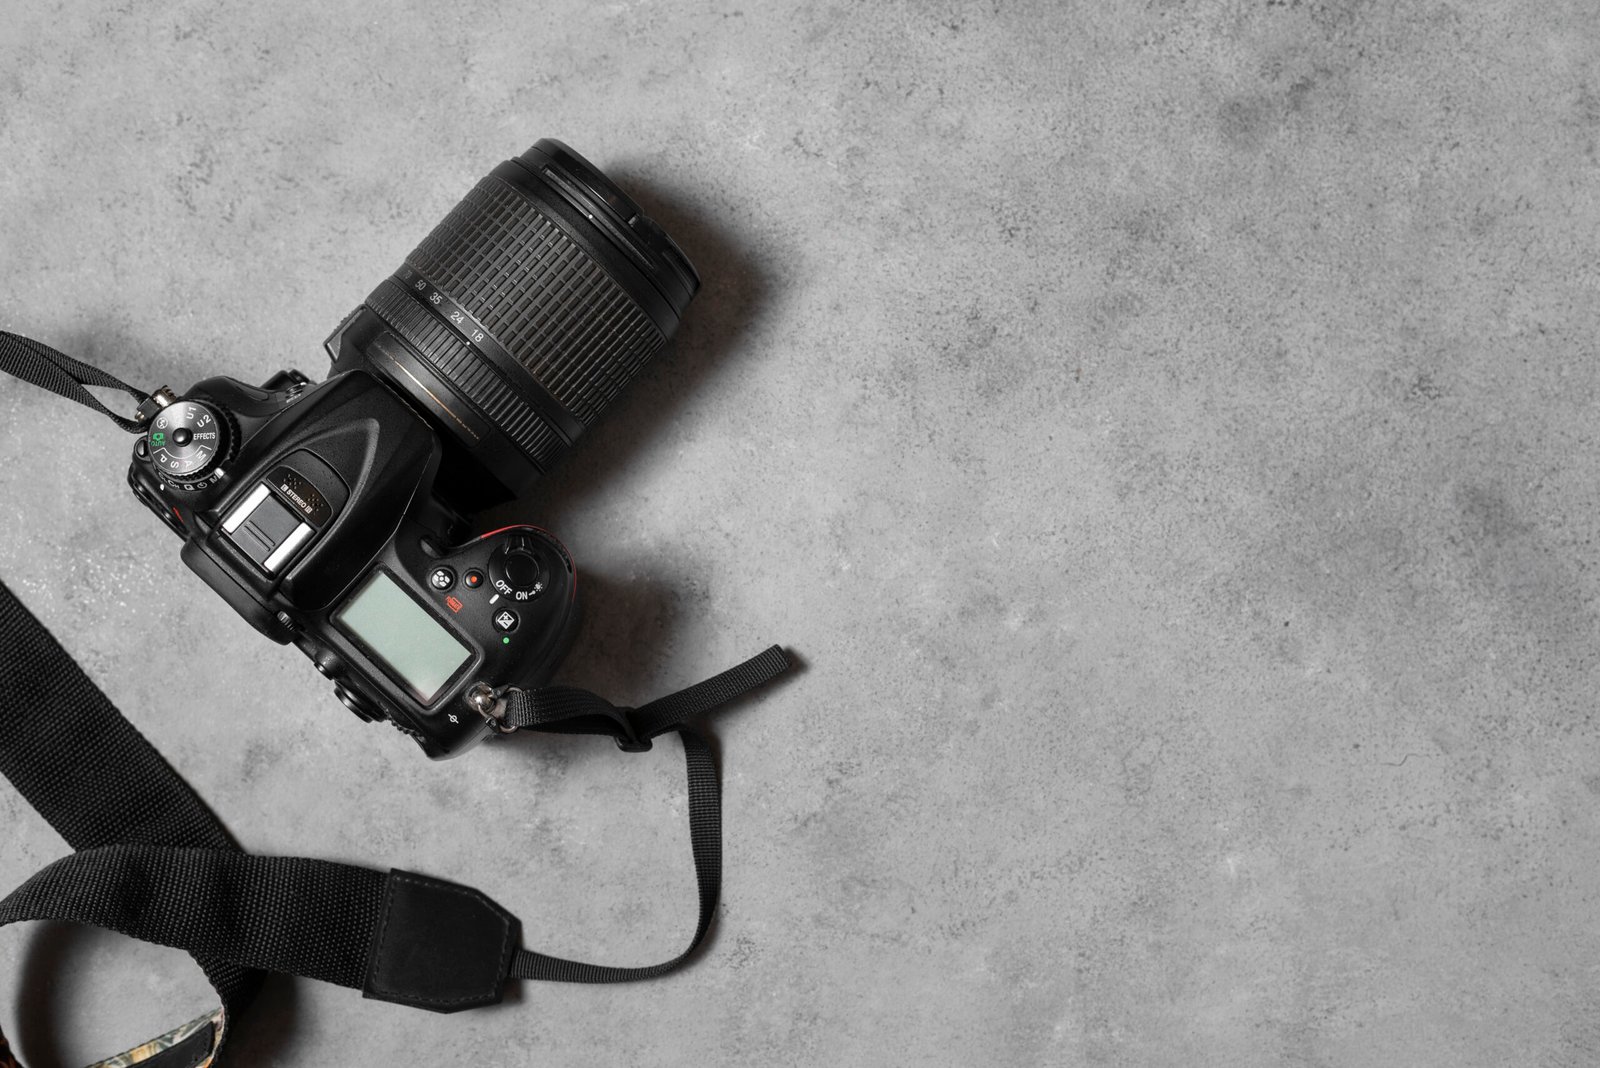
Camera Settings That Make a Difference
You don’t need a fancy camera, but good settings = great results.
- Aperture (f/stop): f/8 to f/11 keeps the entire garment in focus
- ISO: Keep it at 100–400 to reduce noise
- Shutter Speed: Use 1/125 or faster with a tripod to avoid motion blur
- White Balance: Match it to your light source (daylight, fluorescent, etc.)
Using a smartphone? Enable Pro Mode or download a manual camera app to tweak these settings.
Secret Styling Tricks for Better Photos

Want your clothes to look magazine-quality? Try this:
- Use invisible pins or clips to tighten the back of the clothing
- Add tissue paper inside sleeves or collars for structure
- Style the item naturally — like it would look on a person
- Don’t overdo props. Keep it clean and product-focused
- Show multiple angles: front, back, and close-up details
Clothing that appears 3D (not flat) tends to convert better.
Must-Have Gear (That Won’t Break the Bank)
Here’s your affordable starter kit:
- Adjustable tripod (with phone mount if needed)
- A white mannequin (or hangers for flat lay)
- Double-sided tape and safety pins
- A lint roller, brush, and steamer
- Set of 2 softbox lights or daylight bulbs
All this can cost less than $200 and last years.
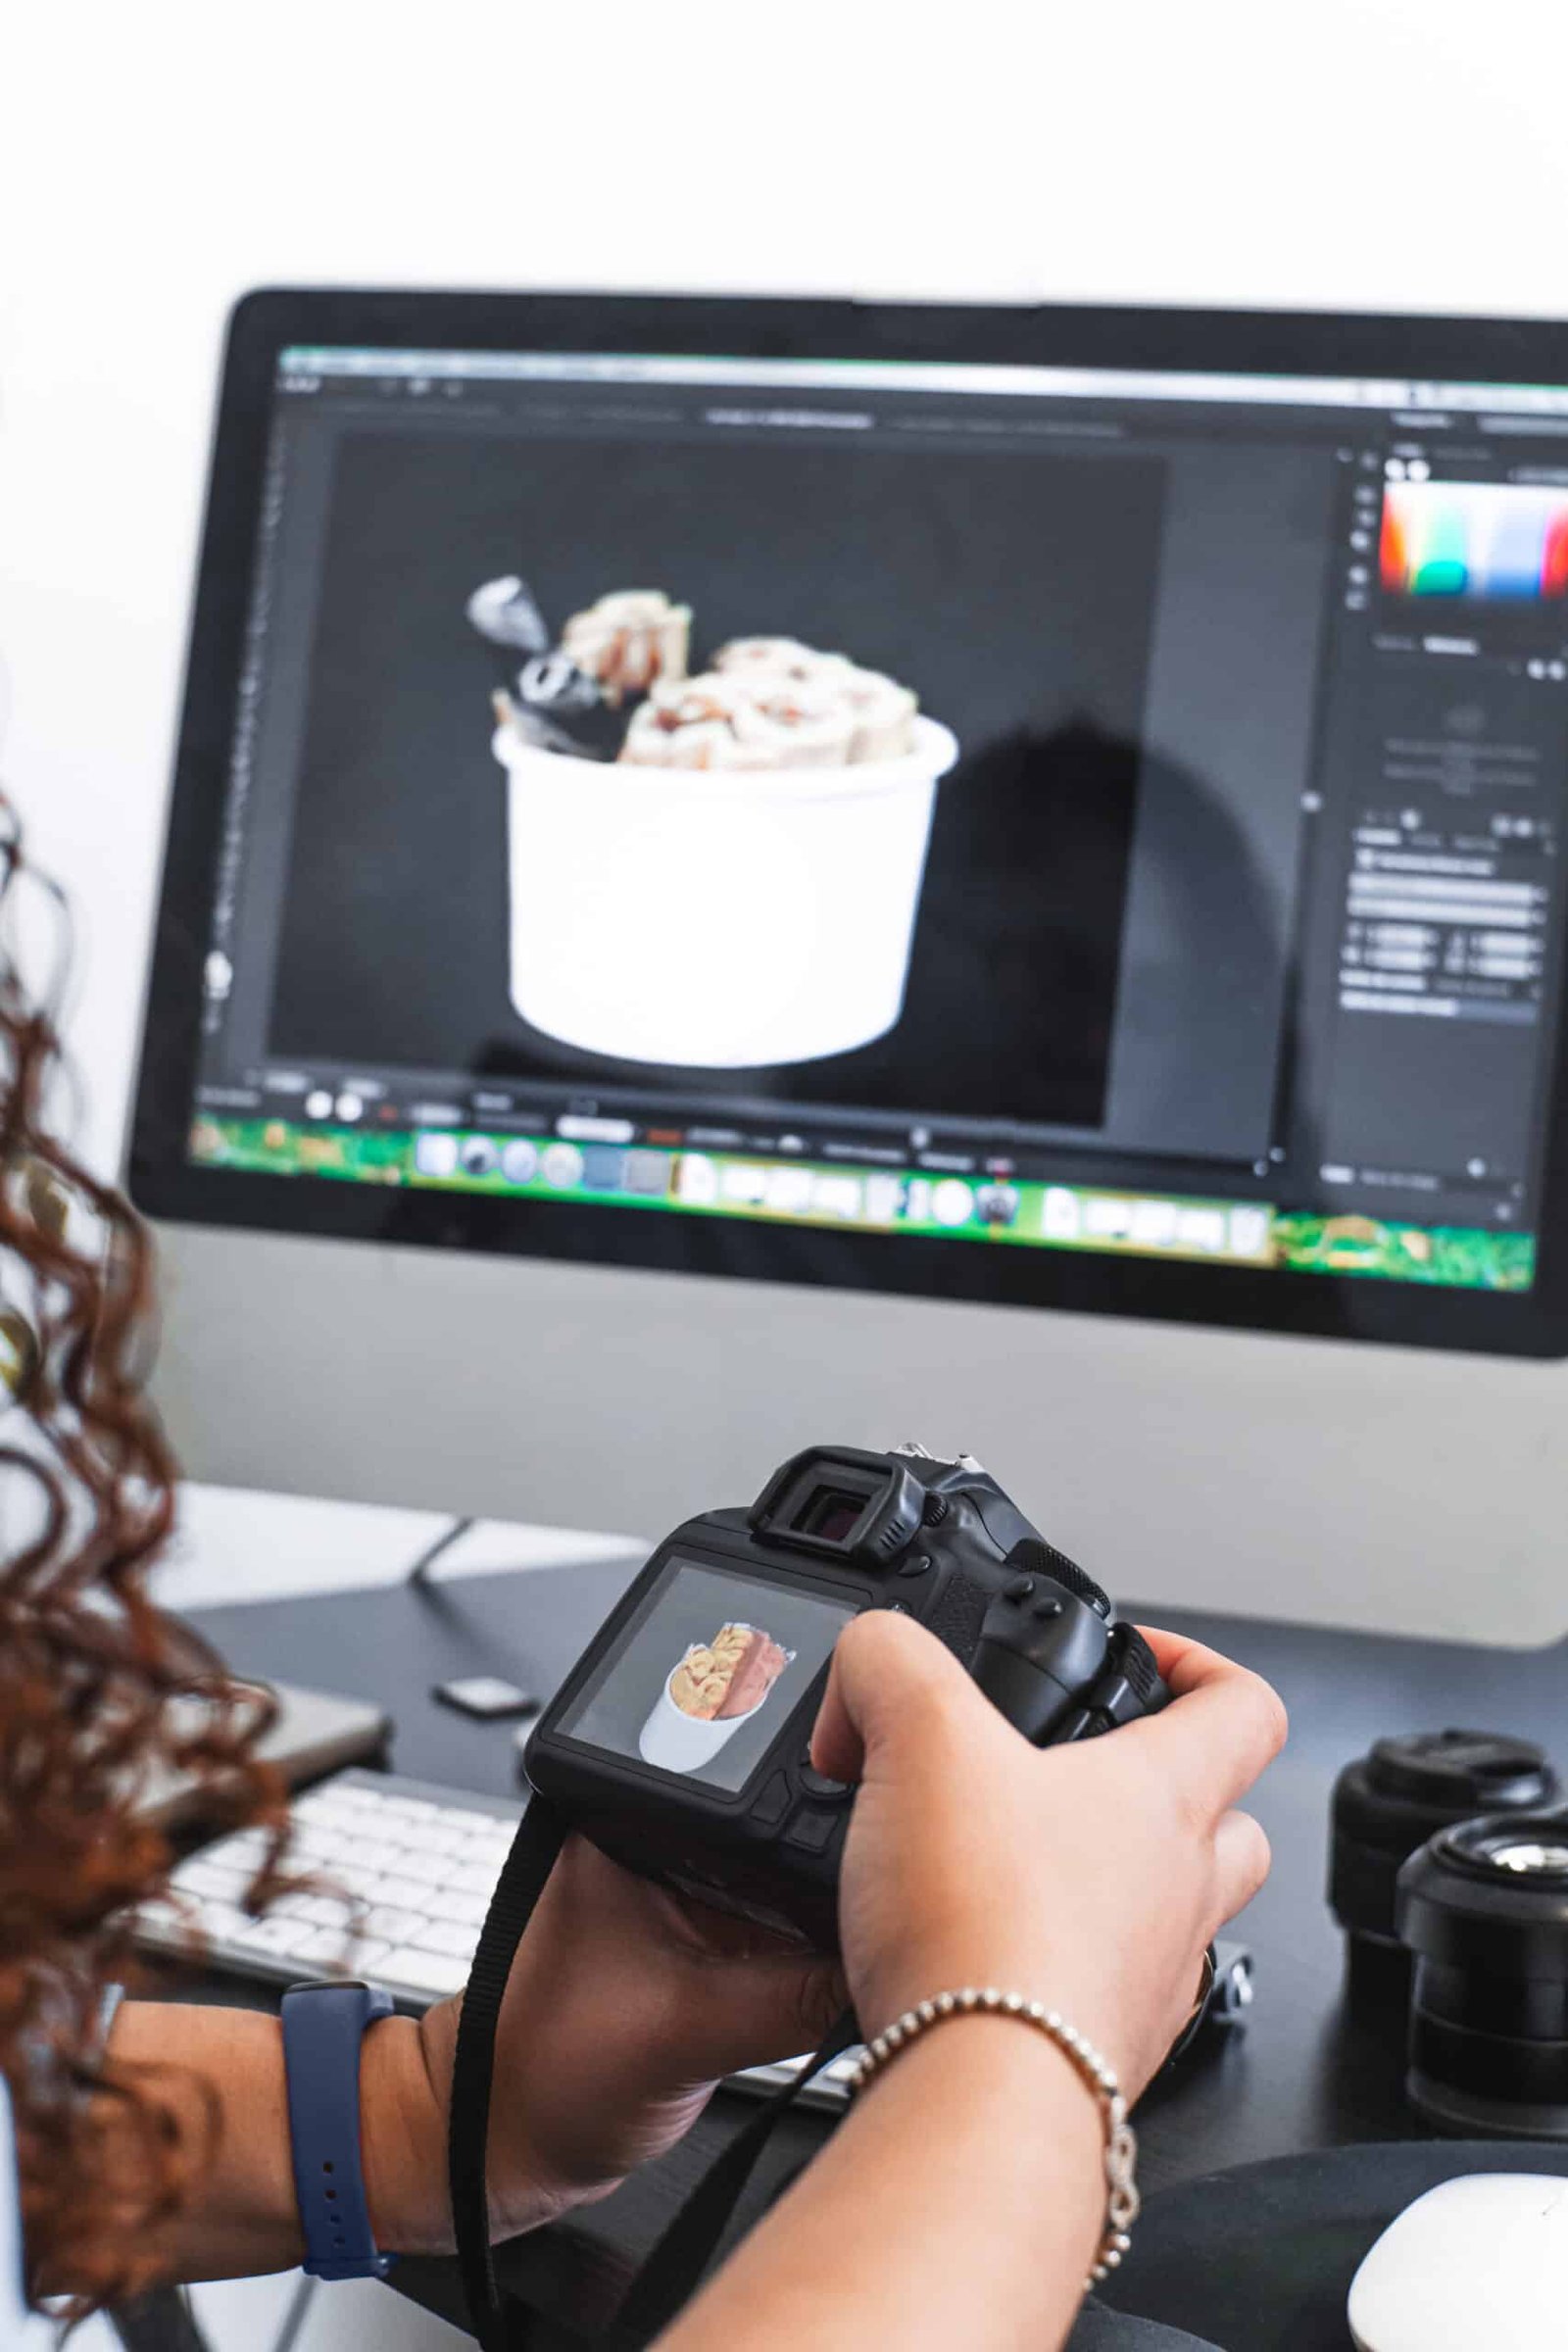
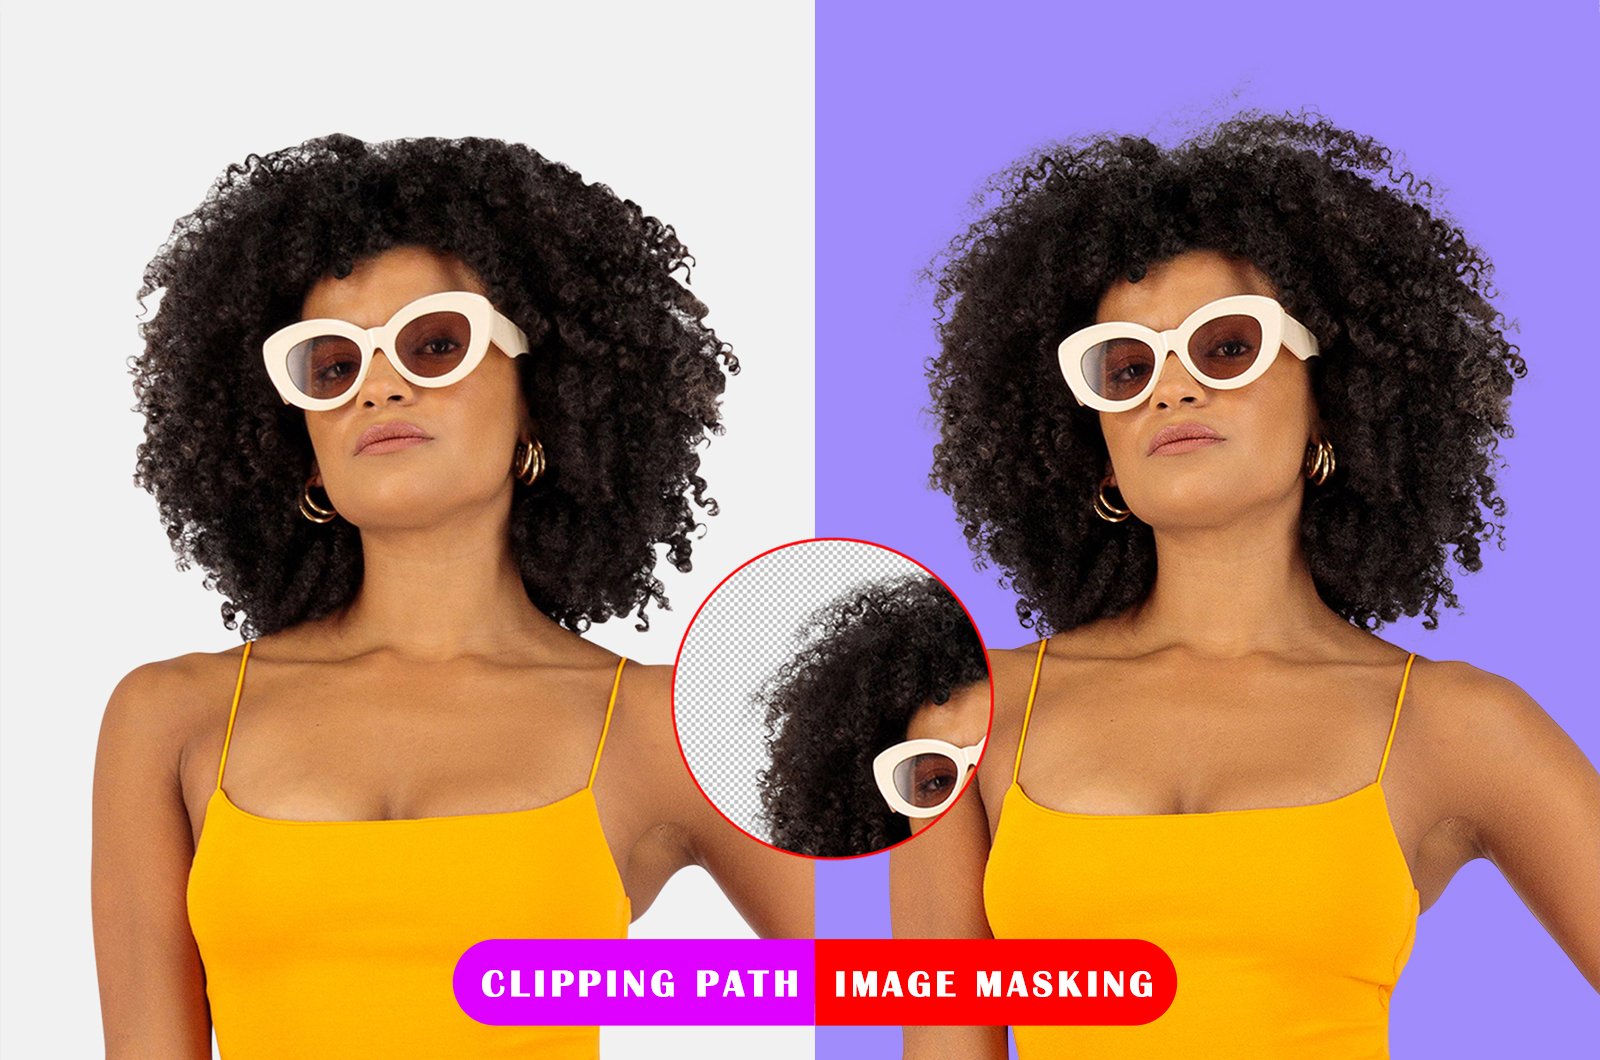
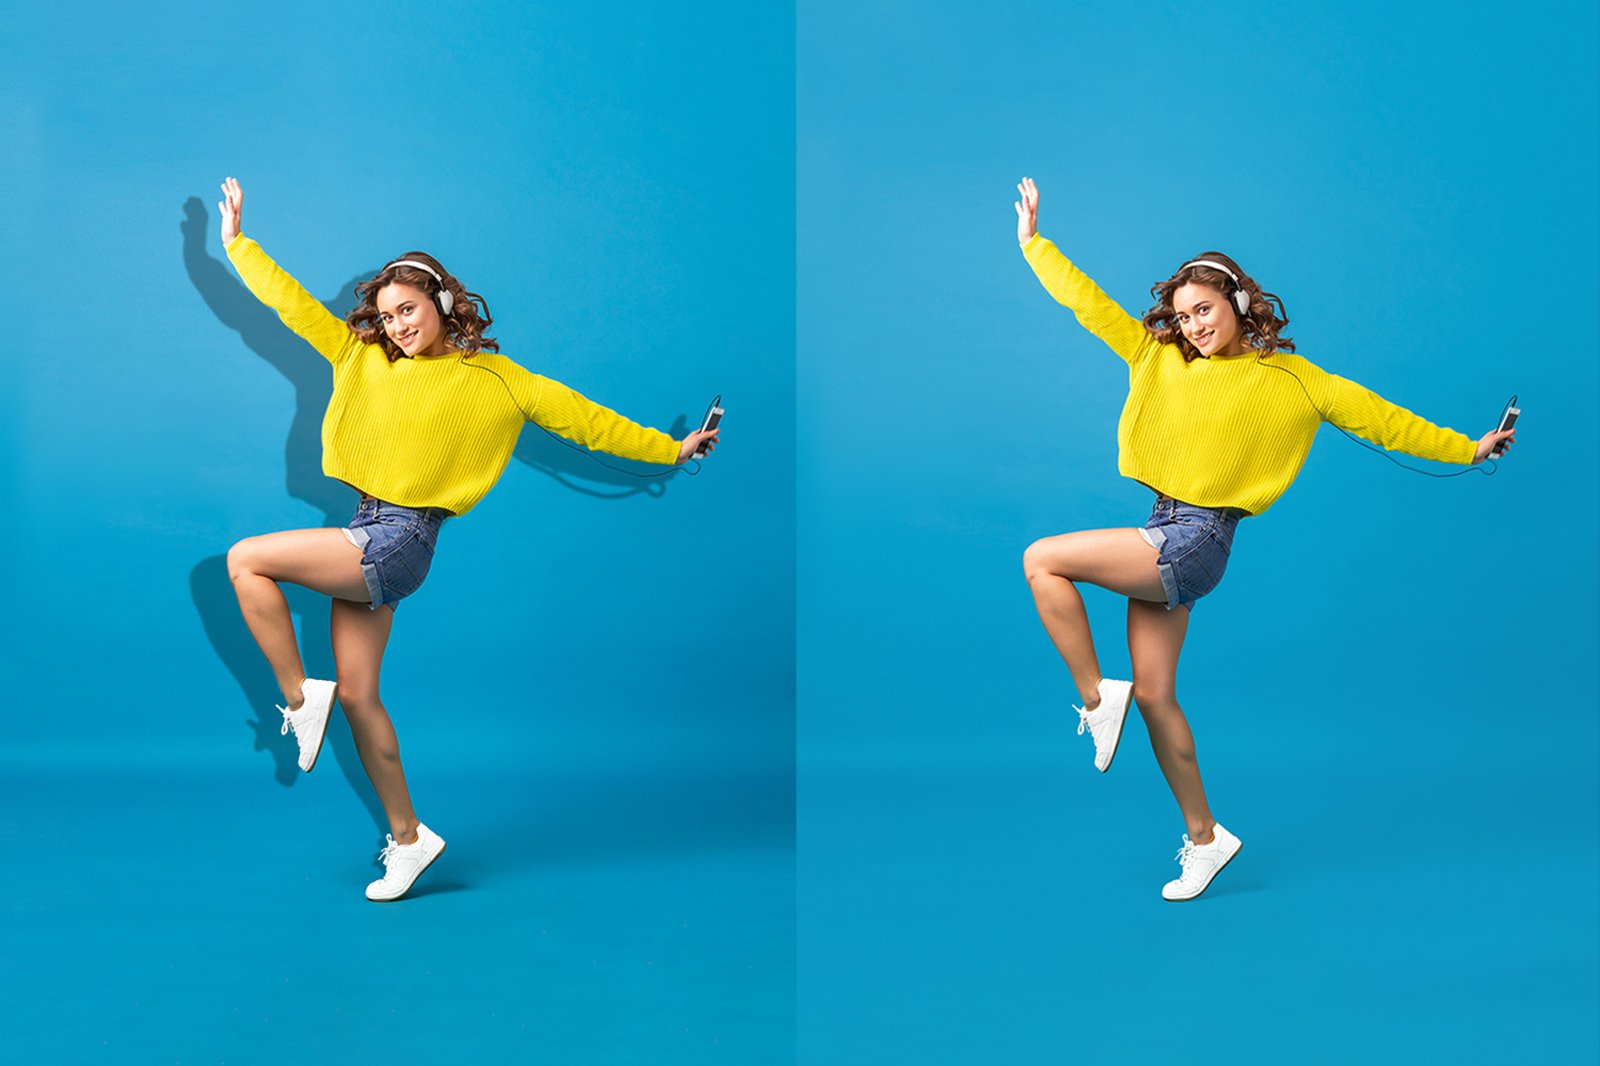
Pro Editing Tips (Clipping Path, Ghost Mannequin, Retouching)
Even with a perfect shot, editing gives your image that polished, eCommerce-ready look.
What to Edit:
- Remove the background (use clipping path or pen tool)
- Apply ghost mannequin effect for a clean, 3D shape
- Adjust brightness, contrast, and white balance
- Remove blemishes, dust, or fold lines with spot healing
- Add a consistent white or transparent background
Use Adobe Photoshop or outsource to a professional editor to save time.
Upload Optimization Tips for eCommerce
To make your photos perform better on selling platforms:
- Rename your files with descriptive names (e.g., “red-linen-shirt-men.jpg”)
- Compress images to reduce loading time (but keep quality)
- Use alt tags with keywords like “how to photograph clothes”
- Upload multiple photos per product (zoom-ins, angles, textures)
- Match image requirements of each platform (Amazon, Etsy, etc.)
Every little optimization helps boost your visibility and click rate.
Final Checklist Before You Upload
✅ Clothes are clean, ironed, and dust-free
✅ Background is clean and consistent
✅ Lighting is soft, with no harsh shadows
✅ Images are sharp and high-resolution
✅ Front, back, and detail shots included
✅ Files named with relevant keywords
✅ Image size and format are platform-ready
Conclusion: Your Photos Sell Your Product
Learning how to photograph clothes professionally — even on a budget — can make or break your online clothing business. Great images build trust, improve CTR, and ultimately, drive more sales.
Don’t settle for average. Use this guide to elevate your brand, wow your customers, and create product photos that sell.
Need help with background removal, ghost mannequin editing, or photo retouching? Our experts at Clipping Path Company are ready to help you look your best.
🎁 Get your first 2-10 images edited FREE – click here to try us out.